Looking to add Google Calendar integration in your Bubble.io app? Here is a detailed step by guide on how you can activate oauth for Google Calendar and make the relevant API call using the Bubble API Connector.
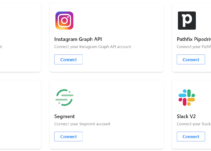
Integration page sample:

Enable OAuth
As the first step to adding Google Calendar, you need to get your users to connect their Google Calendar account to your app. This is the OAuth process through which your users will give your app authorization to access their Google Calendar account and access their data.
The OAuth process is the most secure way for you to get access to your users data. The largest part of the build involves a token system that allows for tokens to be shared between your app and the provider (Google Calendar in this case) to check the validity of the access as well as permission levels that were granted by the user. Once the relevant tokens have been validated, you will be able to access the user data and pull this into your app.
Building a token system alone is a large framework to build if you are building this yourself. However, the entire OAuth process is handled by the Pathfix OAuth platform for all your connected users.
Enable OAuth in Google
You will need a Google Console account in order to build out your developer app. Access your Project on GCP.
Note: If you already have a GCP account with an app built out, edit the app and add the Pathfix Redirect URI https://labs.pathfix.com/integrate/command to the app and save the setting. Copy the ClientID and Secret for use in Pathfix (skip to next section)
- Select your Project and click on the menu options
- Click on APIs & Services and select OAuth consent screen
- Select the type of User as External and click on Create
- The app will be available in test mode and will need to be submitted to Google for review (this can be done later as well)

- Add the name of your app (this is what your users will see once you app is approved by Google, make sure you add your app name that will be recognized by your users)
- Fill in the rest of the App domain info
- Save and continue

- In the following page, search for scopes of Google Calendar that you wish to access
- Click on Credentials from the left nav bar, click on Create Credentials and select OAuth client ID
- Add the name of your OAuth 2.0 client
- Under Authorized redirect URIs, add the Pathfix URI:
https://labs.pathfix.com/integrate/command

- Once saved, you will receive your Google Client ID and Client Secret
- Copy this info for use in Pathfix
Enable Google Calendar API
You will need to enable the Google Calendar API in Google Console in order to start using the API. To do this:
- Click on the hamburger menu on the top left and choose API & Services and select Enable API and Services

- In the search bar, search for Google Calendar API and select the API
- If not Enabled, click on Enable to activate the API

Setup in Pathfix
- Login to your Pathfix account and click on Add Application
- Add the name of your SaaS and hit Save
- From the list, select Google Calendar from the list of providers to integrate with
- Enter the Client ID and Client Secret copied over from Google Console. You can edit the scopes to include scopes you want to access
- You can change the Display Name and Description from the General tab of this window and hit Save
- Click on Test Connection and Connect an account to test the setup

Add Integration in Your Bubble App
Now that we have setup the Google Console window and completed the configuration of your OAuth process, lets go ahead and setup your Bubble app.
We have released a Google Calendar plugin thats available for free to install from the Bubble plugin store. The plugin has a few Actions and Data calls pre-configured making it easier for you to add the functionality to your app.
There are 2 plugins you will need to install in order to get the Connect button and have access to the Data/Action calls.
Once you install both plugins, you will need your Pathfix Keys from your account to link Pathfix to your Bubble app:
- In Pathfix, click on Keys on the left nav bar
- Copy the Public Key and paste it in the Pathfix OAuth Connector plugin
- Copy the x-partner-key and paste it in the Google Calendar (OAuth) plugin

- In your Bubble Design page, add the Pathfix Connector element to an Integration page (or any page you would like to have your users click-to-connect their Google Calendar accounts)
- On the properties window, you can click on ‘All providers configured in my Pathfix app’
- Or, if you have multiple integrations in the same app in Pathfix and only want to show Google Calendar, enter the internal provider name
googlecalendarunder the ‘List of providers’

- Click on Preview
- You will be able to view the Google Calendar Connect button now available for your users to be able to use
- Below are some of the pre-configured Actions and Data calls available for you to use
- You can add workflows or repeating group to List events and calendars of the connected users

Call Additional APIs using the Bubble API Connector
If you are trying to call an API that is not available in the Google Calendar (OAuth) plugin, you can use the Bubble API Connector and configure the API directly.
Here is the best way to do this:
- We recommend testing out any APIs in Pathfix Test Connection page first before confguring this in your Bubble API Connector
- Click on Test Connection and make sure you have connected an account by clicking on Connect
- You can choose to pick one of the sample APIs listed in the dropdown menu on the left

- Once your call is successful, you can easily replicate this in your Bubble API Connector
- Below is a sample setup using the Bubble API Connector with further detailed instructions:

- Key Value and Development Key Value is the Pathfix private_key
- Add the POST URL as
https://labs.pathfix.com/oauth/method/googlecalendar/call - Key name should be public_key the value of key can be found at
- Check Private
- Check Queryst. - Key name should be user_id. Enter your Pathfix account login email ID over here (Note: Ensure that you have tested the connection after configuring your integration in Pathfix)
- Uncheck Private
- Check Queryst.
You can click on Initialize Call and on successful response, save the API for use in your app.
When using the API, you will be asked to enter the user_id, always add this as the Current User’s Unique Id in order to make sure the data is shown for the user that is currently logged in and connected:

This will complete your Google Calendar integration in your Bubble app.
We have detailed Bubble setup documentation available in our dedicated space for Bubble developers that can be access here: https://docs.pathfix.com/bubble
Do reach out to our team is you have any questions on your setup or need assistance with an integration.